Update device status with actions
What are actions and types of actions
An action is an event performed on a device to register a state change.
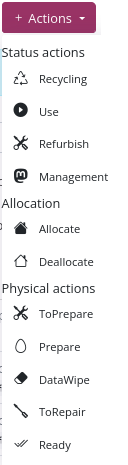
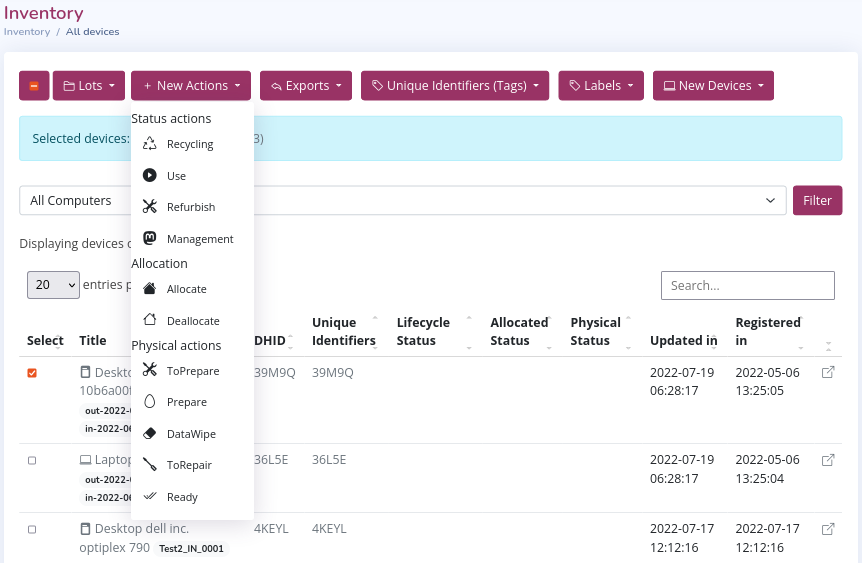
In the actions button, the actions are grouped by these three types and you can apply actions on one or more devices that you have selected.
There are three types of states depending on whether they refer to their life cycle, assignment to users, or operation.
- Lifecycle state actions record a managed, used, refurbished, or recycled state.
- [Assign] actions record status of being assigned or unassigned to a user making use of the device.
- [Physical or functional state] actions record a pre-refurbished, post-refurbished, data wipe, under repair, or repaired state
Lifecycle Actions
Lifecycle actions allow us to record the lifecycle states that a device has or has had.
There are mainly four types of life cycle actions that we can record in the traceability system:
- Recycling actions: records that a device is or has been in recycling
- The actions of use: it registers that a device is in the process of use
- Refurbish Actions: Records that a device has been refurbished
- Management actions: record that a device has been managed
The result of performing these actions is reflected in the list of devices.
For more information see how to Create a lifecycle action
Allocate Actions
The "Allocate" actions allow you to indicate that a device is assigned to a user, or "Deallocate" that it has been unassigned.
For more information see how:
Physical state actions
Physical state actions allow you to record the physical state that a device has or has had.
There are mainly five types of physical state actions that we can record in the traceability system:
- The "ToPrepare" action indicates that a device has not yet been reconditioned.
- The "Prepare" action indicates that a device has been refurbished.
- The "ToRepair" action indicates that it needs to be repaired
- The "Ready" action indicates that it is suitable for use
- The "DataWipe" action indicates that it has been wiped and allows you to attach a wipe certificate
For more information see how:
Create a lifecycle action
To create an action on a device we must do:
- Select the device (or devices)
- Go to the devices menu, option "+ Actions" and select the corresponding action
- In the action definition window we can establish informative fields. There are no required fields.
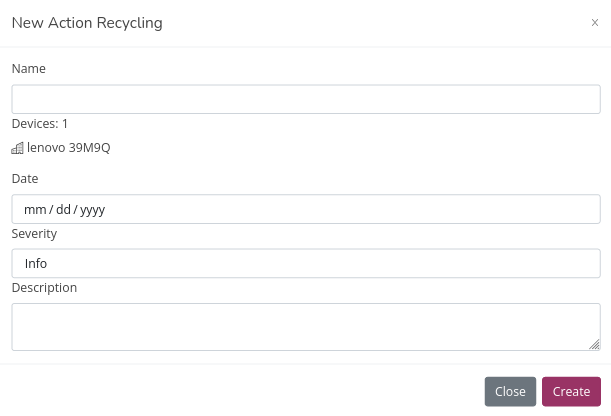
Note: In this case we do a recycling action on the "39M9Q" device. Devices: 1 indicates that the action will be applied to a device.
1. "Name of action": A name or title of the action. Used to perform searches on actions
2. "Date of action": The date the action took place
3. "Severity of action": Allows you to indicate the action has been carried out normally or you want to note any warning or error

    1. Info: The action has been carried out normally.
    2. Notice: The action has been carried out normally but you want to include a minor warning.
    3. Warning: The action has been carried out successfully but you want to include an important notice.
    4. Error: The action has an error.

4. "Description of action": The description of what was done in the action
- Click "Create" from the definition window
Create an allocation
To create an "Allocate" status action of a device we must do:
- Select the device (or devices)
- Go to the devices menu, option "+ Actions" and select the option "Allocate".
- In the action definition window we can establish informative fields. The only required field is the "Start time".
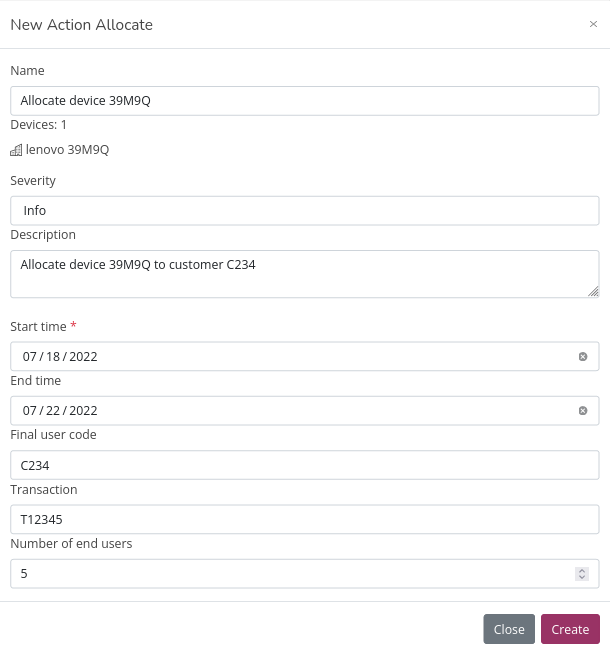
Note: Devices: 1 indicates that the action will be applied to a device.
1. "Name of action": A name or title of the action. Used to perform searches on actions.
2. "Severity of action": Allows you to indicate the action has been carried out normally or you want to note any warning or error.

    1. Info: The action has been carried out normally.
    2. Notice: The action has been carried out normally but you want to include a minor warning.
    3. Warning: The action has been carried out successfully but you want to include an important notice.
    4. Error: The action has an error.

3. "Start time": Start date of the loan. It is the only required field.
4. "End time": Expected date of completion of the loan. If this date is reached, the device remains in "allocate" status and must explicitly "deallocate" to change its status.
5. "Final user code": Code of the user who receives the device on loan.
6. "Transaction": Loan transfer code. For use in ERP systems.
7. "Number of end users": Number of end users that will use the device. Indicating this value allows accounting for the impact of the loan.
- Click "Create"
Create a deallocation
To create a "Deallocate" state action we must do:
- Select the device (or devices).
- Go to the device menu, option "+ Actions" and select the option "Deallocate".
- In the action definition window we can establish informative fields. The only required field is the "Start time".
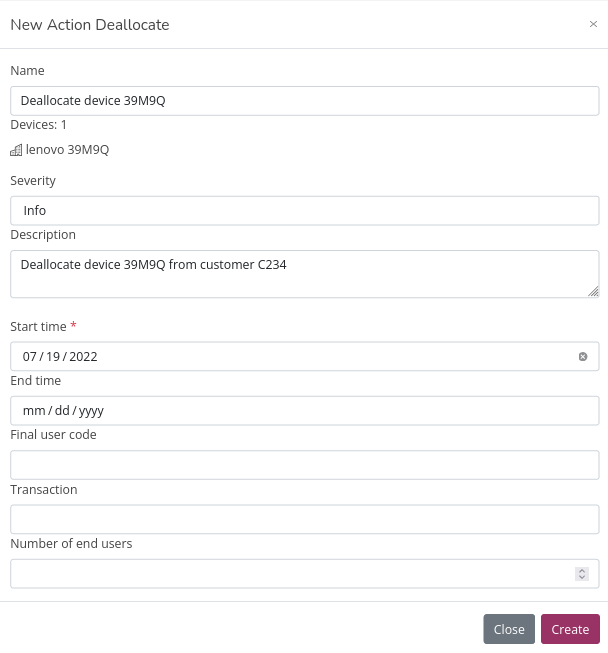
Note: Devices: 1 indicates that the action will be applied to a device.
1. "Name of action": A name or title of the action. Used to perform searches on actions.
2. "Severity of action": Allows you to indicate the action has been carried out normally or you want to note any warning or error.

    1. Info: The action has been carried out normally.
    2. Notice: The action has been carried out normally but you want to include a minor warning.
    3. Warning: The action has been carried out successfully but you want to include an important notice.
    4. Error: The action has an error.

3. "Start time": End date of the loan. It is the only required field.
4. "End time": In this case this value has no special meaning.
5. "Final user code": Code of the user who receives the device on loan.
6. "Transaction": Loan transfer code. For use in ERP systems.
7. "Number of end users": Number of end users that will use the device. Indicating this value allows accounting for the impact of the loan.
- Click "Create"
Create a physical state action
To create a fitness action of the types "ToPrepare","Prepare", "ToRepair" and "Ready", perform the following steps. The "Data wipe" action is described in the next section.
Steps to perform:
- Select the device (or devices).
- Go to the devices menu, option "+ Actions" and select the desired option.
- In the action definition window we can establish informative fields. There are no required fields.
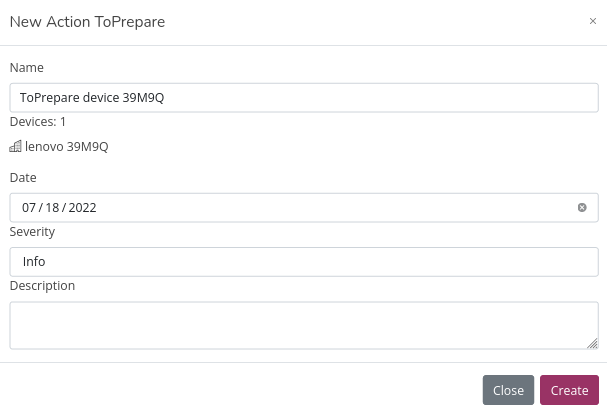
Note: In the example we make a "ToPrepare" action.
1. "Name of action": A name or title of the action. Used to perform searches on actions.
2. "Date of action": The date on which the action is performed.
3. "Severity of action": Allows you to indicate the action has been carried out normally or you want to note any warning or error.

    1. Info: The action has been carried out normally.
    2. Notice: The action has been carried out normally but you want to include a minor warning.
    3. Warning: The action has been carried out successfully but you want to include an important notice.
    4. Error: The action has an error.

4. "Description of action": The description of what was done in the action.
- Click "Create" in the definition window.
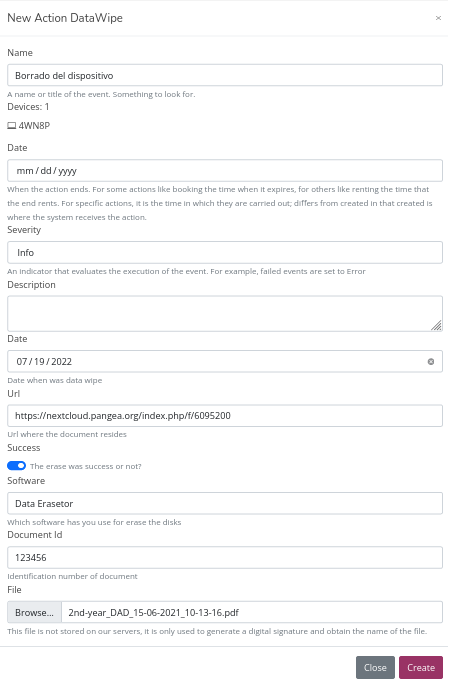
Create a data wipe action
The meaning of the "Datawipe" action is that a device is or has been wiped.
This action is manual and it is allowed to attach a url that contains a file with a data deletion certificate. In the event of data erasure using the "Usody Erasure" software, this action is created automatically.
Steps to perform:
- Select the device (or devices)
-
Go to the device menu, option "+ Actions" and select the option "DataWipe".
-
In the action definition window we can establish informative fields.
-
"Name of action": A name or title of the action. Used to perform searches on actions
-
"Date of action 1": The end date of the data deletion process. This value does not provide much information and will be removed shortly
-
"Severity of action": Allows you to indicate the action has been carried out normally or you want to note any warning or error
- Info: The action has been carried out normally
- Notice: The action has been carried out normally but you want to include a minor notice
- Warning: The action has been carried out successfully but you want to include an important warning
- Error: The action has an error
-
"Description of action": The description of what was done in the action
- "Date of action 2": The date on which the action was performed
- "Url": Web address where the deletion certificate is located. You can protect this url with a password and it is not necessary to provide the same
- "Success": Successful or unsuccessful result of deletion
- "Software": Name of the software used to erase the device
- "Document Id": Id of the deletion document for its internal record
- "File": File with the deletion certificate. We do not store this file, we only do the data signature so that you can verify in the future if it has been modified.
-
-
Click "Create" from the definition window