Troubleshooting
Usody Snapshot not uploaded in the inventory
The following information should be displayed in the command line of the Usody pendrive:
------------[ STEP 1: Starting HW METADATA] ---------
[VERSION] 2022.12.2-beta
[SETTINGS] No Settings Version (NaN)
[SID] 15396
_____________(STEP 1: Generating Snapshot)____________
[INFO] LSHW successfully completed.
[INFO] DMIDECODE successfully completed.
[INFO] LSPCI successfully completed.
[INFO] HWINFO successfully completed.
[INFO] SMART on sda successfully completed.
[INFO] SMART on sdb successfully completed.
[INFO] Snapshot generated properly.
_____________(STEP 2: Saving Snapshot)____________
[INFO] Snapshot successfully saved on /mnt/snapshots/
[SNAPSHOT] 2023-01-04_15h58m33s_15396_snapshot.json
_____________(STEP 3: Uploading Snapshot)____________
[WARNING] No Internet. [Errno 101] Network is unreachable
[WARNING] We could not auto-upload the device.
[WARNING] Settings URL or TOKEN are empty.
[WARNING] You can manually upload the snapshot.
------------[ HW METADATA FINISHED] ---------
[INFO] ========== ( SUMMARY ) =============
[VERSION] 2022.12.2-beta
[SETTINGS] No Settings Version (NaN)
[SID] 15396
[SNAPSHOT] 2023-01-04_15h58m33s_15396_snapshot.json
[INFO] Finished properly. You can press the power button to turn off.
The [STEP 3] has thrown an exception, this can be for two reasons
-
The PC does not have an ethernet cable with internet access connected, to fix this connect an ethernet cable with internet access
-
The settings.ini file has not been added into the pendrive, to fix this see section Step 3 - Add the settings file into the pendrive
Configuring to boot from pendrive
In the PC to Register. We have to check within the BIOS settings, if the first boot option is the USB pendrive
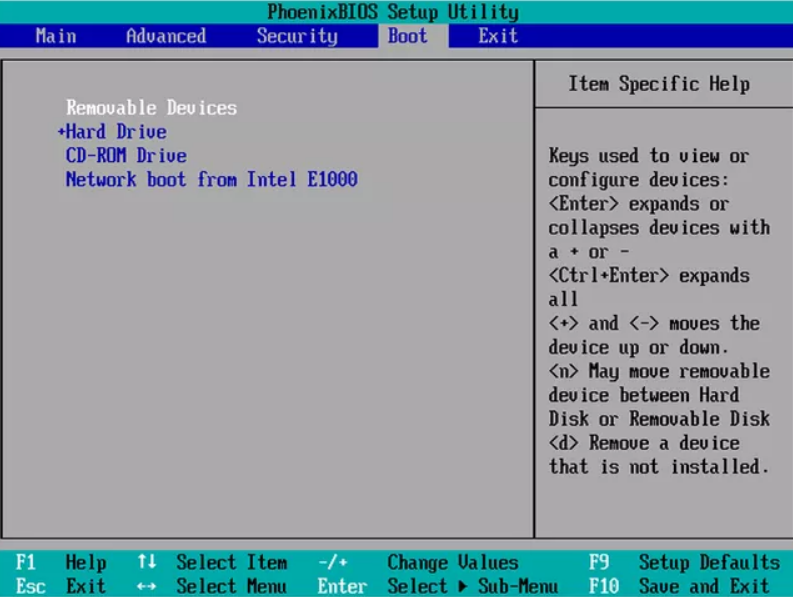
To access the BIOS settings you have to press the hotkey designated by the PC when booting the PC to register it. Hotkey list: DEL and F2 are the most popular hotkeys on PCs. Acer: F2 or DEL, ASUS: F2 for all PCs, F2 or DEL for motherboards, Dell: F2 or F12, HP: ESC or F10, Lenovo: F2 or Fn + F2, Lenovo (desktops): F1, Lenovo (ThinkPads): Enter + F1, MSI: DEL for motherboards and PCs, Microsoft Surface Tablets: Hold down the volume up button, Source PC: F2, Samsung: F2, Sony: F1, F2 or F3, Toshiba: F2
Access to the Snapshot in the pendrive
On Windows the folder is located on the flash drive, access the 'wb_snapshots' folder to see the list of generated Snapshot(s) files.
On Linux you will not be able to access the Snapshot(s) file(s) directly, you must mount the partition first, follow the steps below:
-
Enter the following command line command to identify the partition "Hidden FAT16 < 32M".
sudo fdisk -lThe result of the command execution is as follows:
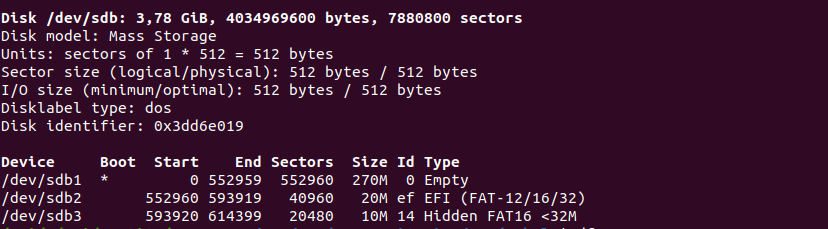
Note: In our case it is /dev/sdb3.
-
Mount the partition
sudo mount /dev/sdb3 /mnt -
Copy the snapshot generated from the partition on the flash drive to a folder on your computer
sudo cp /mnt/snapshots/2022-07-21_14h05m17s_Y7JLZ_snapshot.json /home/$USER/Downloads/ ``Note: to see the snapshots created run the command
ls -l /mnt/snapshots/
Usody pendrive does not boot
Assuming that point Configuring the BIOS to boot from USB pendrive has been carried out correctly, if the picture of step 2.3 does not appear. Make sure that the legacy boot option is enabled in the bios. Below are some screenshots to check this point. Currently Usody does not support UEFI booting.


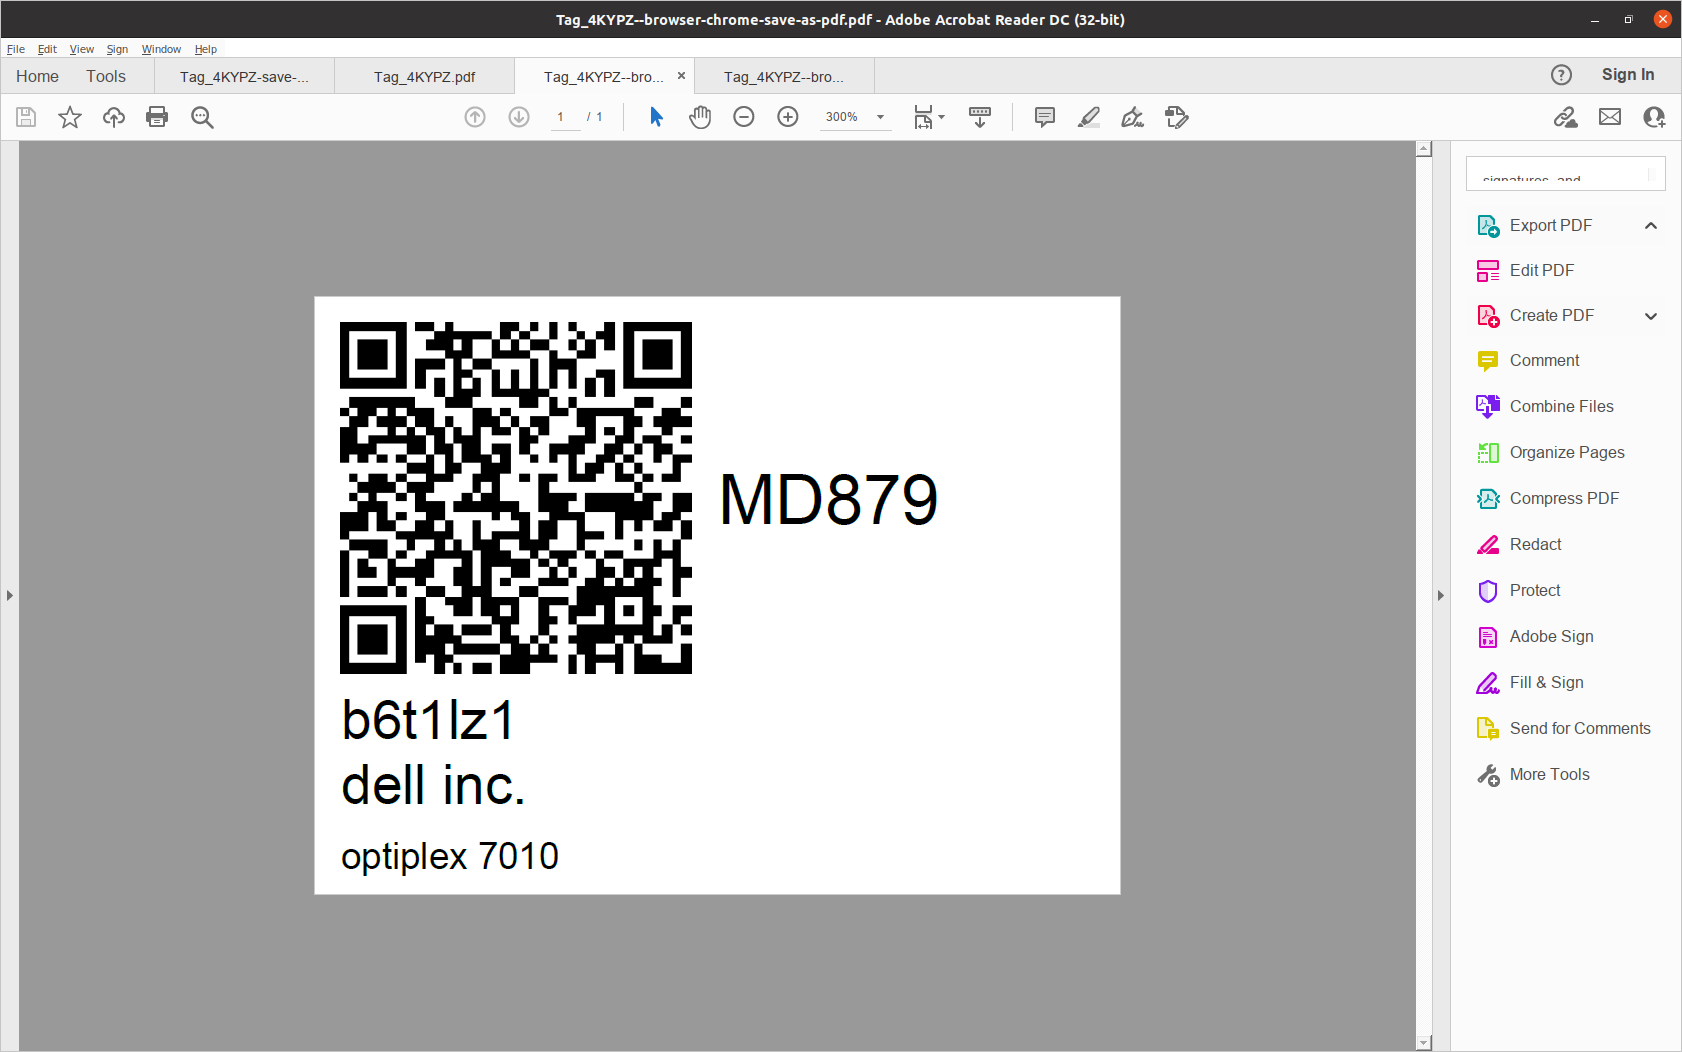
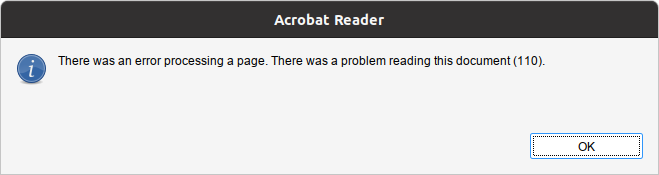
Print Label - Acrobat Reader can't open PDFs Labels - error 110
Acrobat Reader cannot open pdfs generated by Usody and generates an error like the following:
The solution to be able to print from Acrobat Reader is to save them in PDF from the web browser.
Here is how to restore PDF documents that have already been created.
-
Open Firefox or Chrome browser
-
Navigate to the local PDF document.
-
Click on the print option
-
Click on "Save as PDF"
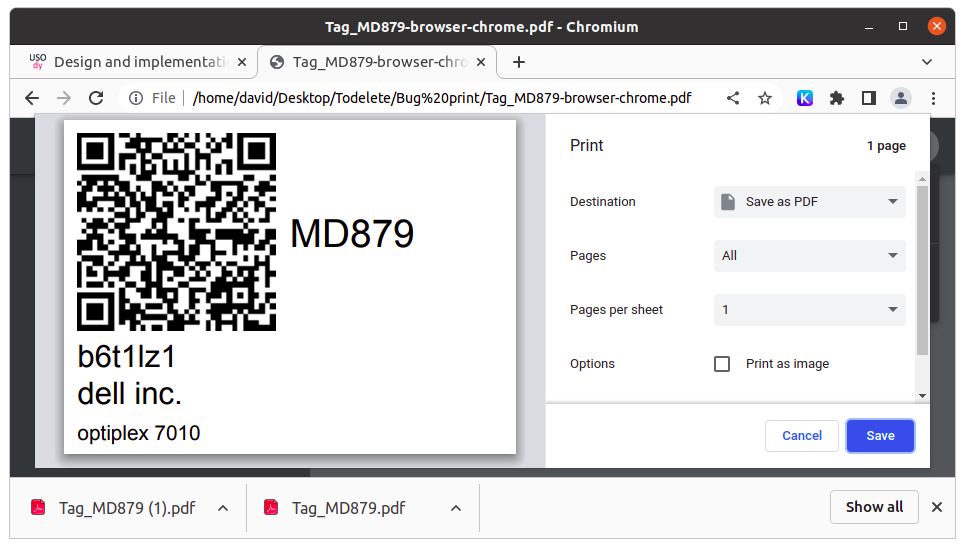
The resulting PDF can now be printed from Acrobat Reader